04 Apr Setting Up a Raspberry Pi Web Server & Personal Radio Station – Part 3
Now, let’s turn our Raspberry Pi into our own Internet Radio Station. In this guide we will:
- Set up Samba – to be able to remotely access folders. This way we can modify configuration and exchange other files more easily
- Install Icecast2 – this will be the brains behind our streaming server
- We will make the station accessible from the outside
Step 1
Type these commands:
sudo apt install samba samba-common-bin
sudo smbpasswd -a pi
mkdir Temp
sudo chown pi:pi Temp
sudo chmod 777 Temp
sudo nano /etc/samba/smb.conf
Modify the smb.conf as follows:
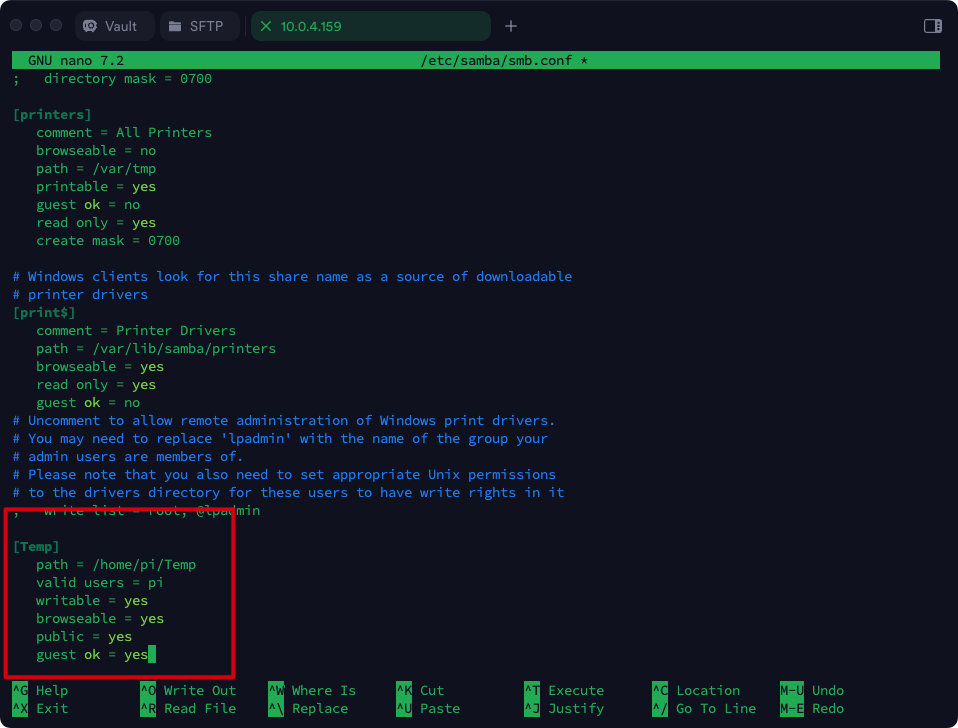
Save the changes!
Ctrl-O and Ctrl-X
Now type the following:
sudo systemctl restart smbd
Now you have a folder, Temp, that you can see from a remote computer. Note that in order to access it, you will have to use pi as the username, and whatever you chose as your password.
Let’s install icecast2:
sudo apt install -y icecast2
sudo nano /etc/icecast2/icecast.xml
You will modify icecast.xml with the following. Save and exit:
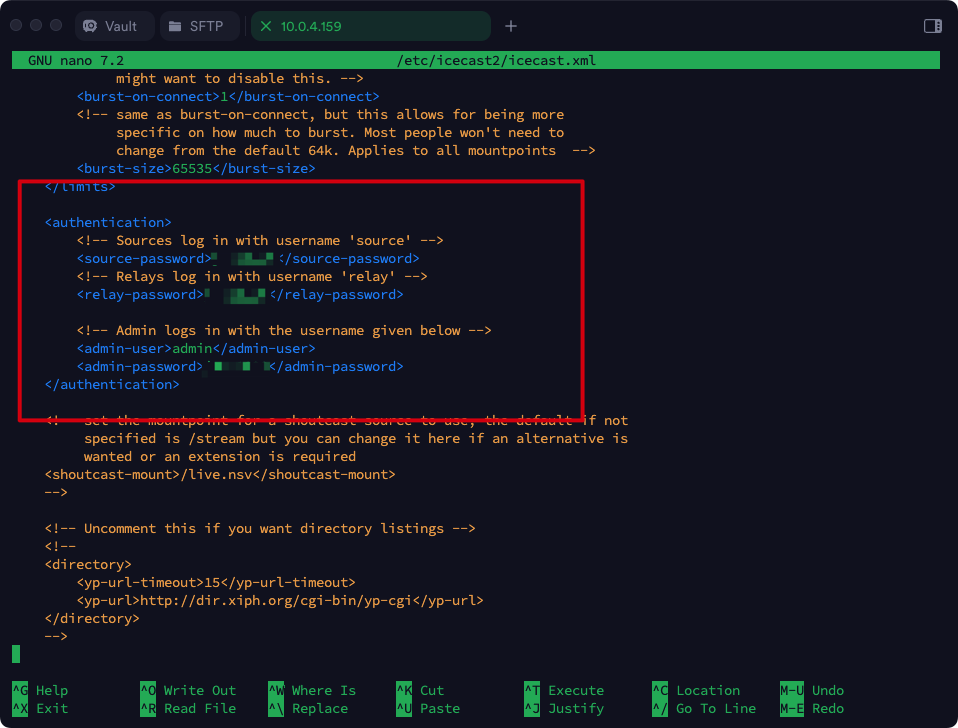
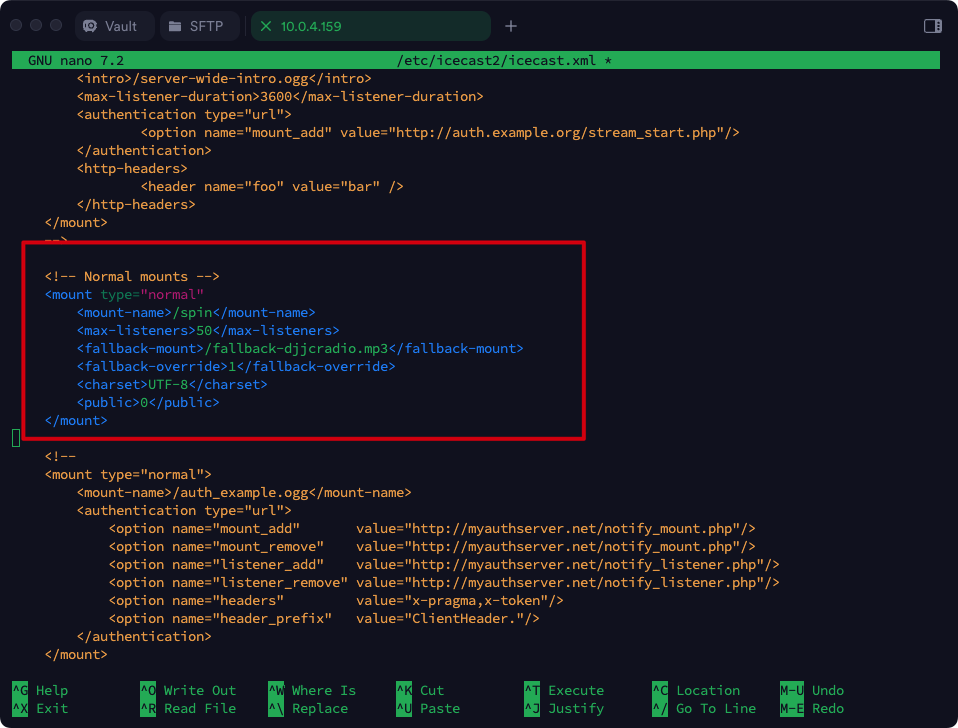
When the radio station is not running, you will need an MP3 file that will play automatically to let listeners know that the station is offline. I named it fallback-djjcradio.mp3. Copy that file into the Temp folder which should show up in your network drives:

We are going to copy the MP3 file from the Temp folder, to the correct folder:
cd /usr/share/icecast2/web
sudo cp /home/pi/Temp/fallback-djjcradio.mp3 /usr/share/icecast2/web/
If you enter ‘ls’, this is what will be listed:
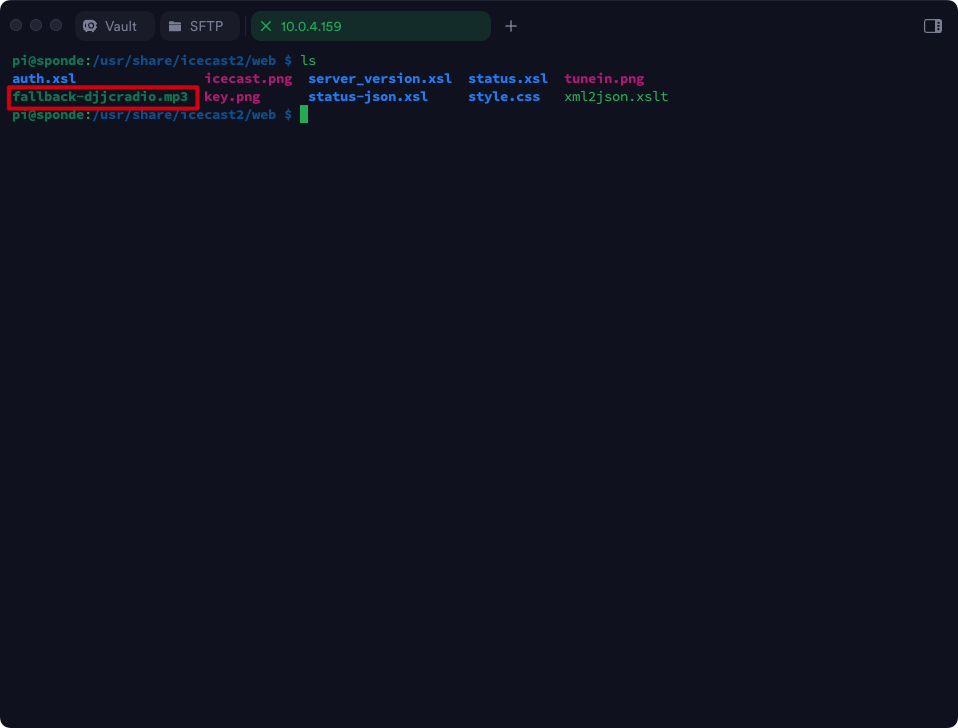
Now we will restar the icecast2 server:
systemctl start icecast2
systemctl enable icecast2
sudo reboot
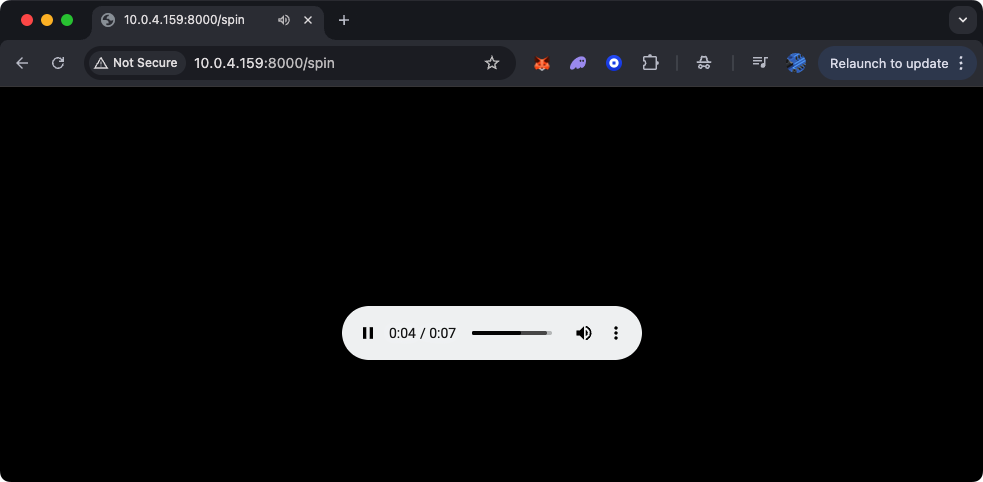
Once your system has been rebooted, you can type in the browser the following and you will listen to the fallback MP3 audio:
Step 2
Now that icecast2 is working, then we need to use software which will be used to play the music and route it thru the server. I am using a combination of 2 apps. Note that this software will be running in your regular computer, not the Raspberry Pi. The Raspberry Pi will act only as the stream server, nothing more:
- Radiologik DJ & Scheduler (https://macinmind.com/?area=app&app=radiologik&pg=purchase) – this is to program the music, mix it without silence, etc. But you can use Apple Music, Spotify or any other app.
- Audio Hijack (https://rogueamoeba.com/audiohijack/) – this is what will route the audio to icecast2.
Step 3
Playing the music! For this, I will not go to into too much detail, but start playing music, as usual, in your regular computer.
Step 4
We need to configure Audio Hijack to communicate with icecast2:
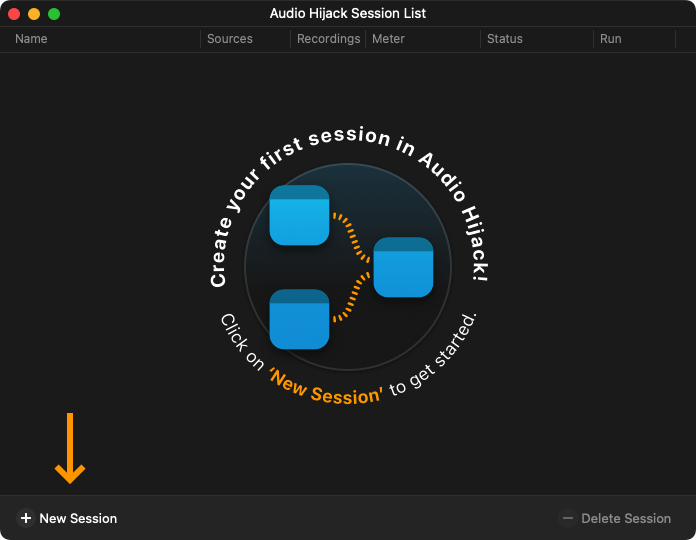
Let’s start a New Session:
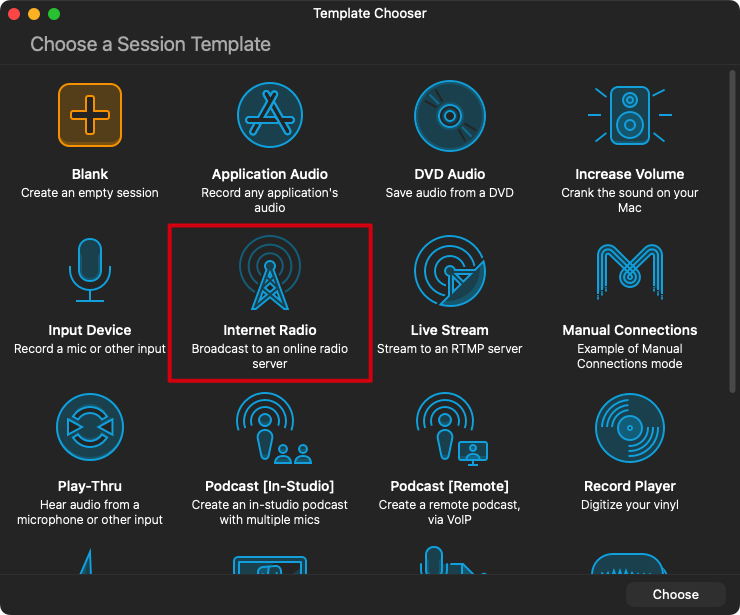
Choose the template “Internet Radio”:
This is what it looks like:
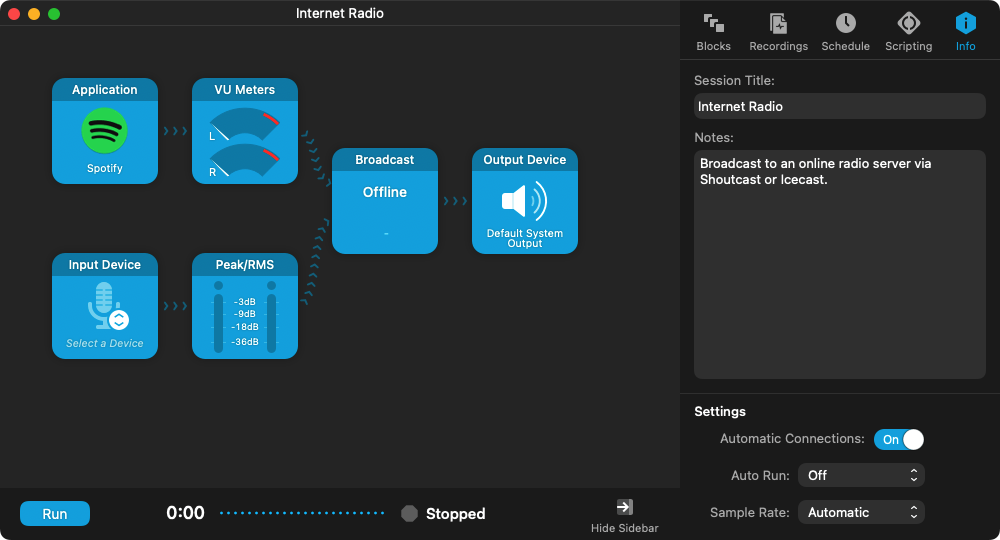
Make changes as necessary. First I will change Spotify for Radiologik DJ.
Now, in the Broadcast box, I will enter the information for icecast2:
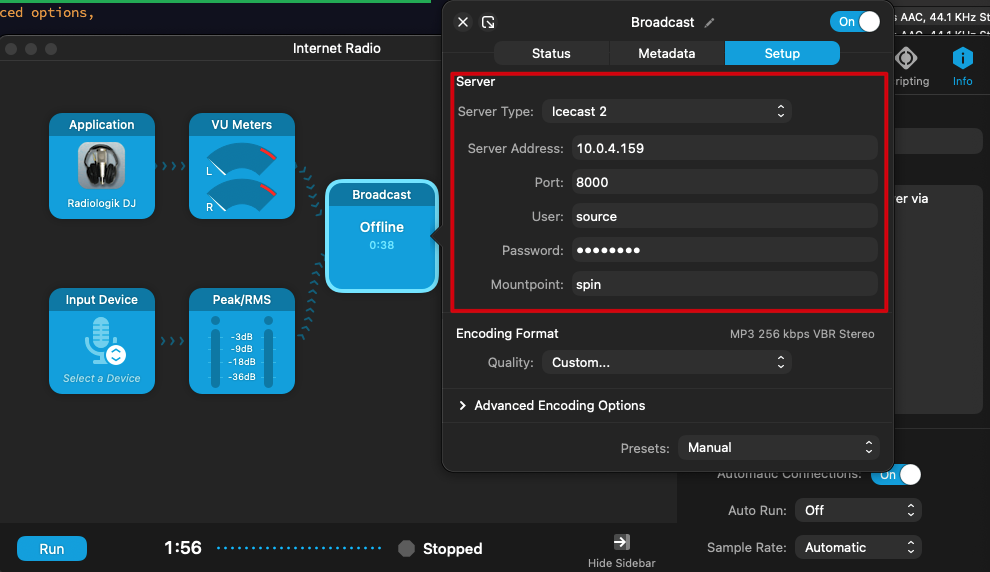
Click on Run…
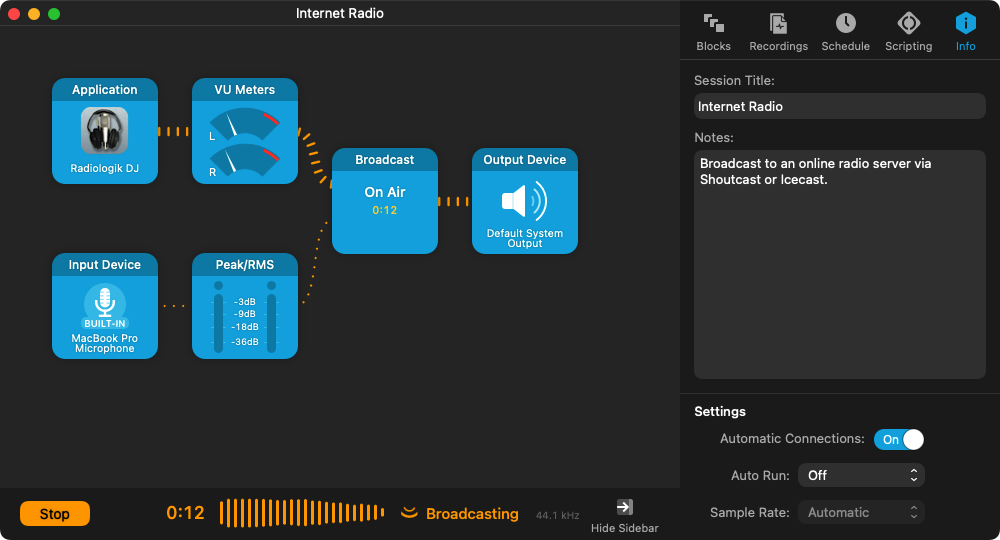
Step 5
What about when I am outside my house? Well, that’s the point… we want to be able to broadcast outside our home.
- Create an account with no-ip using this link: https://www.noip.com?fpr=n3by1
- Under Dynamic DNS, Create a hostname using a name and domain of your liking:
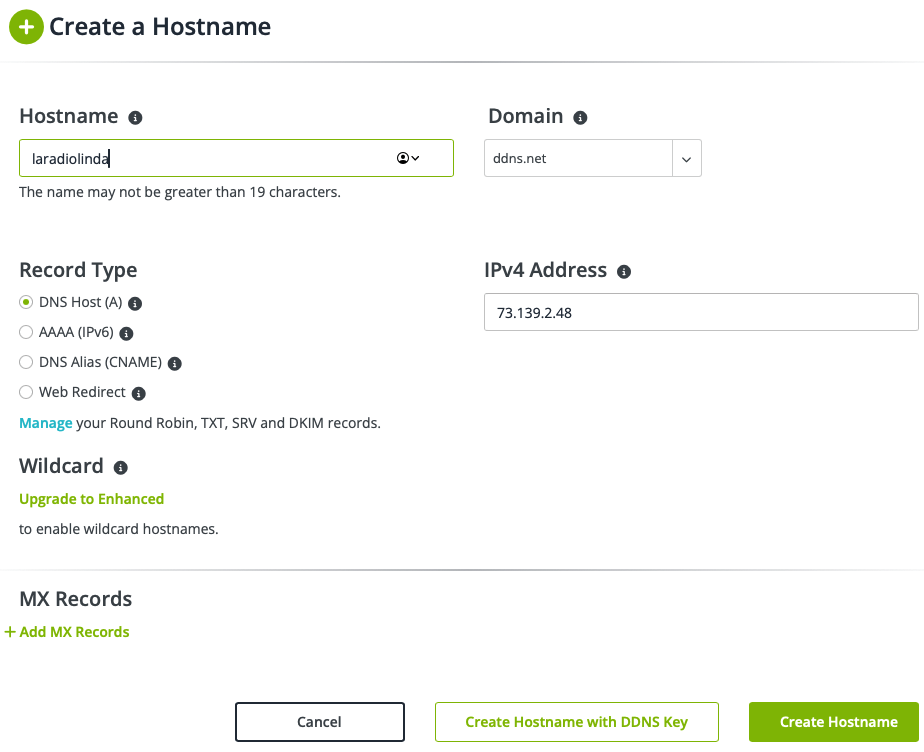
Now, you can leave your computer playing music, and from the outside you will be able to access the station by entering http://laradiolinda.ddns.net:8000/spin
Problems?
- There are certain internet providers that use port 8000 and have it reserved. If you are having issues connecting from the outside, change the port in icecast.xml and Audio Hijack to 8100.
- You might need to open port 8000 or 8100, depending on your router and configuration.
- You might need to use port forwarding, so that everything coming to port 8000 or 8100, gets routed to the correct device: sponde.
- Test it actually using a device from the outside. I.e. turn off the wifi on your mobile phone and try to reach the http that way. There are internet service providers that will block any loopback. In plain English, while in your house you must access the station using http://10.0.4.59:8100/spin but outside of your house you must use http://laradiolinda.ddns.net:8000/spin
Step 6
Most of the internet service providers will assign you an external ip address that will dynamically change every now and then. And since no-ip is pointing to that ip address, you need a piece of software that will update that ip address into the no-ip database every time it changes. Look here for more info depending on your OS: https://www.noip.com/support/knowledgebase/section/dynamic-dns-update-clients
Step 7
Let’s make the connection secure. First, you will get an SSL cert using the steps in here. Now, let’s bundle the PEM into 1 file, give the file the correct permission, and let’s modify our icecast.xml:
sudo su

cat /etc/letsencrypt/live/laradiolinda.ddns.net/fullchain.pem /etc/letsencrypt/live/laradiolinda.ddns.net/privkey.pem > /etc/icecast2/bundle.pem

chmod 666 /etc/icecast2/bundle.pem

nano /etc/icecast2/icecast.xml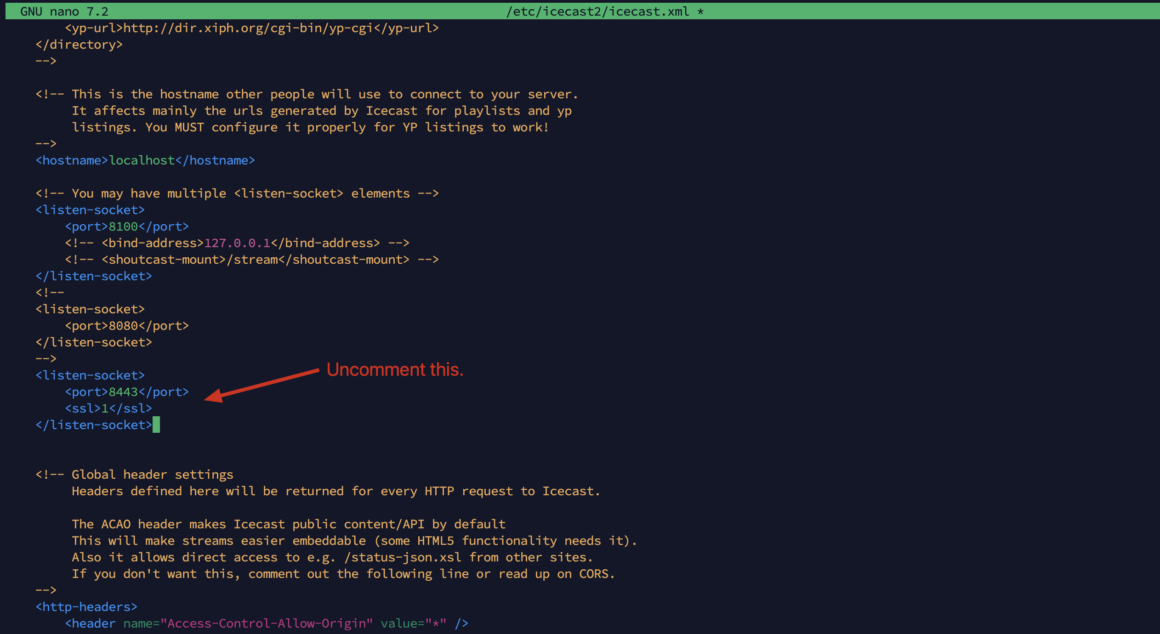
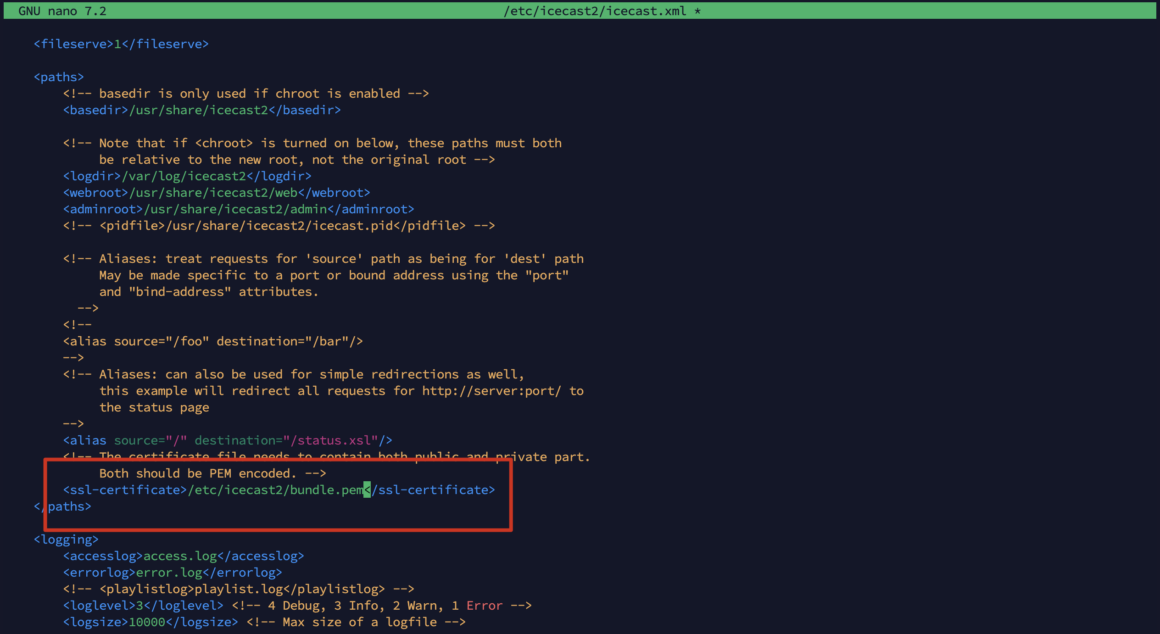
Reboot your Raspberry Pi. Make sure in your router you are forwarding 8443 to your Raspberry Pi. Now, you can use https://laradiolinda.ddns.net:8443/spin for a secure connection to your radio.


Pingback:Setting Up a Raspberry Pi Web Server & Personal Radio Station - Part 2 - Jose Cotes
Posted at 21:30h, 04 April[…] Go to Part 3 of this guide. […]