04 Jan Swap Faces to Create an AI Character Using Stable Diffusion
If you’re interested in designing an AI-generated character with a consistent face but varying poses, environments, and outfits, you might consider using Stable Diffusion. This user-friendly approach can assist in crafting a virtual influencer for platforms like Instagram.
The Installation
Install Stable Diffusion if you have not done so already.
Download the epicRealism Model here:
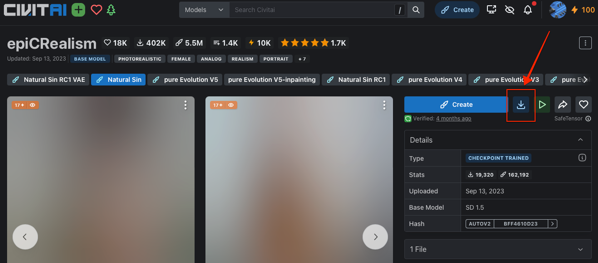
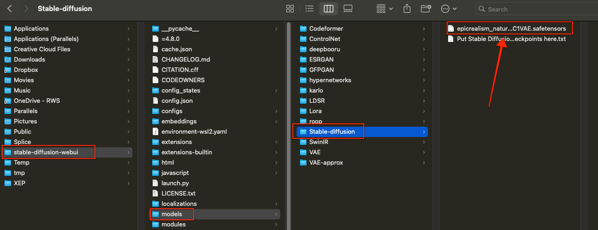
Copy or move that file to the folder stable-diffusion-webui/models/Stable-diffusion/:
Download the epiCRealismHelper Model here:
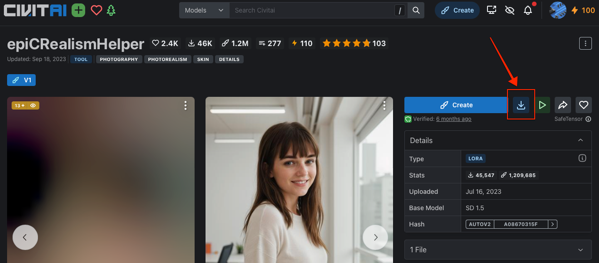
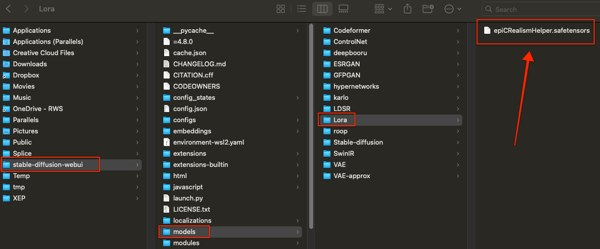
Copy or move that file to the folder stable-diffusion-webui/models/Lora/:
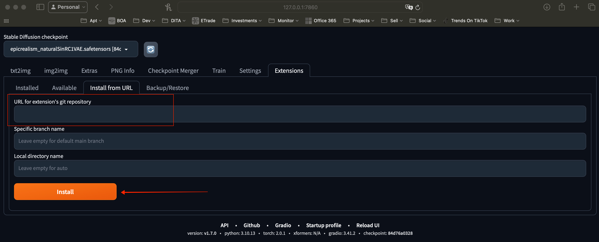
Open Stable Diffusion and Install the following Extensions, by placing these 3 links in the URL box, and clicking Install. Wait until each one has been fully installed:
https://github.com/s0md3v/sd-webui-roop
https://github.com/Coyote-A/ultimate-upscale-for-automatic1111
https://github.com/Mikubill/sd-webui-controlnet
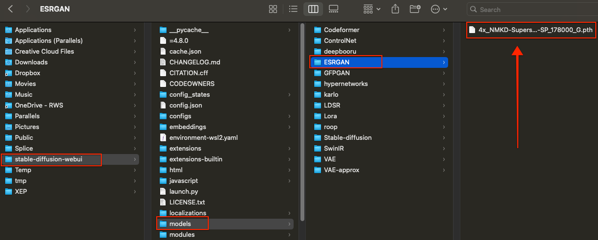
Download the following upscaler in this link:

Copy or move that file to the folder stable-diffusion-webui/models/ESRGAN/:
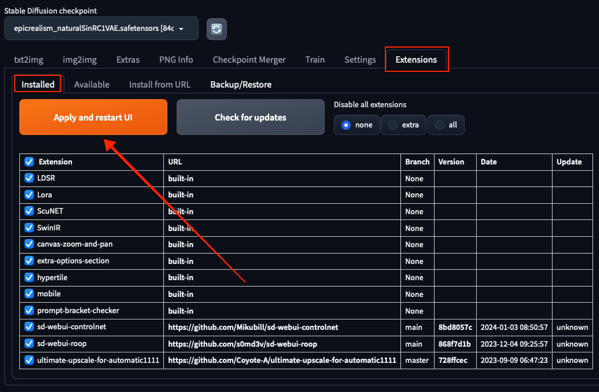
When everything is ready, go to the Extensions tab –> Installed and click on Apply and restart UI:
The Process
Make sure the checkpoint selected is epicrealism_naturalSinRC1VAE. Go to the tab img2img, select Inpaint and drag the face that you want to change – the target image:
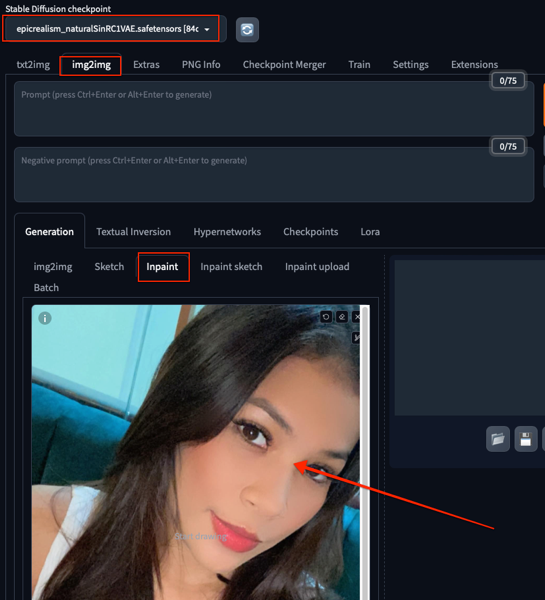
Paint the face and neck:
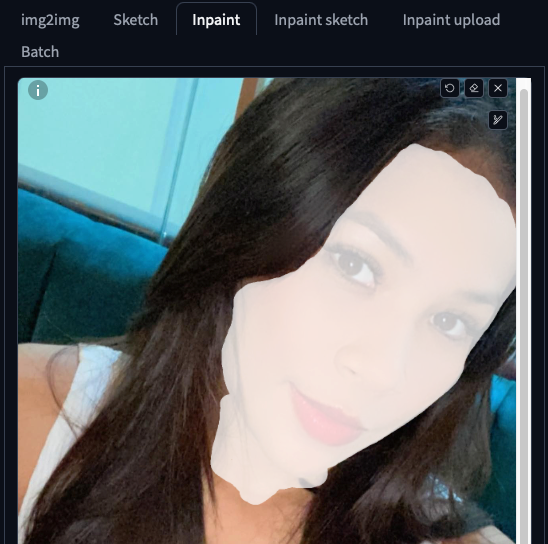
Change the following settings to the following values:
Only masked padding, pixels to 50
Sampling metthod use DPM++ 2M Karras
Sampling steps to 30
For dimensions click on the ruler
CFG Scale to 6
Denoising strenght to 0.45
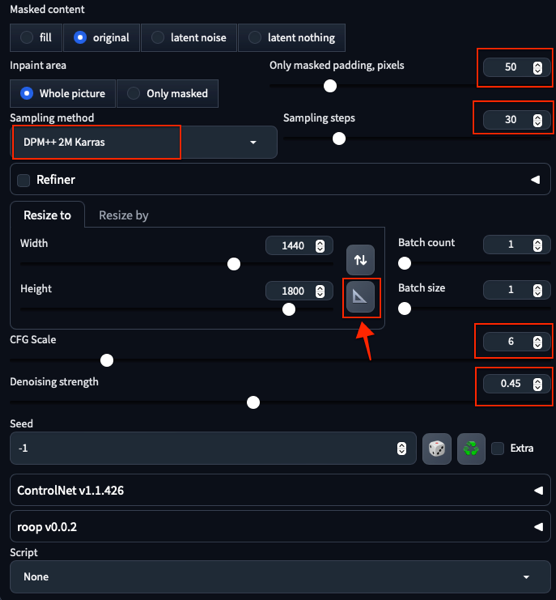
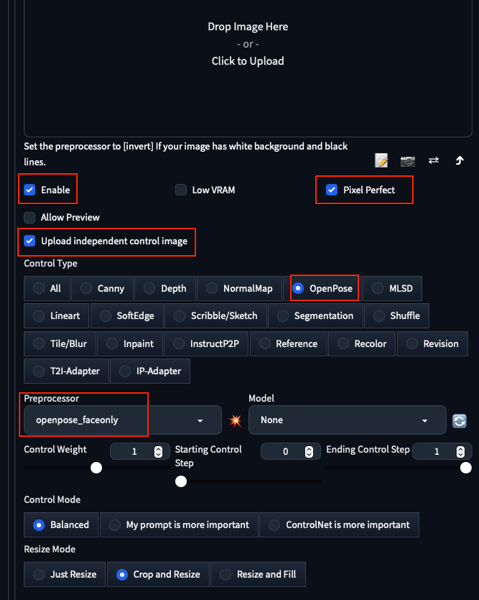
Under the ControlNet tab change the following:
Click on Enable
Click on Pixel Perfect
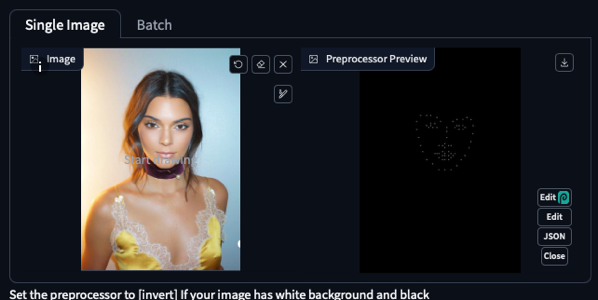
Click on Upload independent control image
Control Type to OpenPose
Preprocessor to openpose_faceonly
Drag the source image, or the image that you want your final face to look like, and click on the Explosion icon:
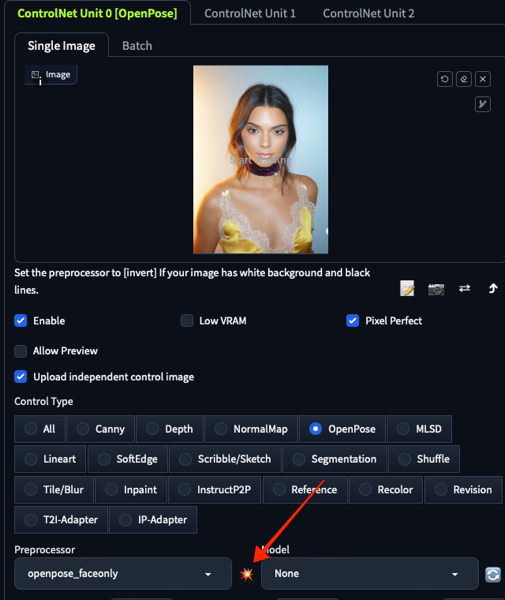
This should be the result:
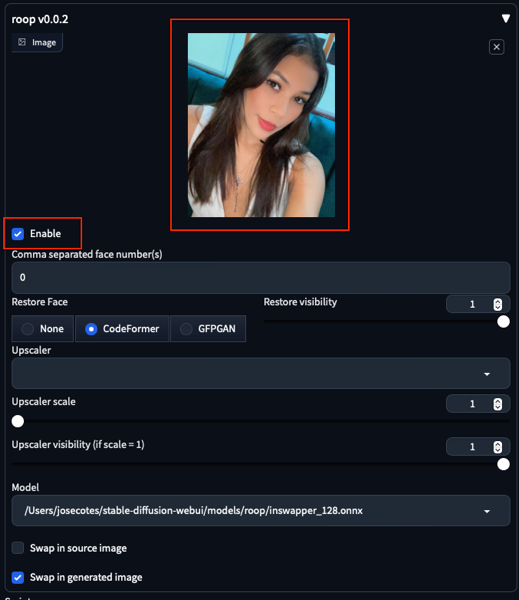
Under the roop section, place again your target face and click the enable button:
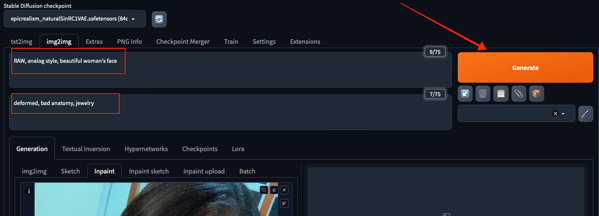
In the prompt section write the following:
RAW, analog style, beautiful woman's face
On the negative prompt wrtie the following:
deformed, bad anatomy, jewelry
Hit Generate:
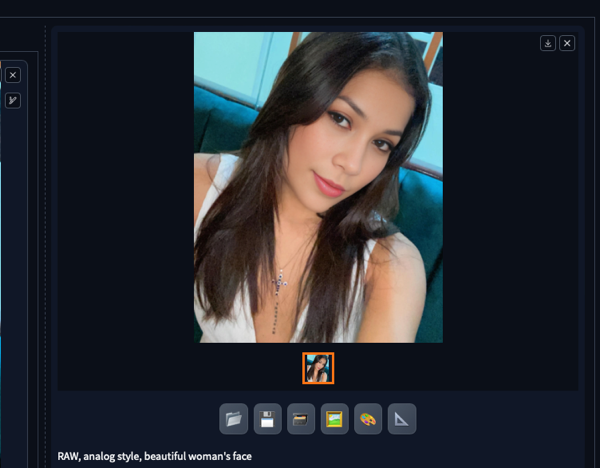
This is the result:
The Touch Up
We will now make the image better by upscaling it and making it more natural.
Download the result and open a new tab for Stable Difussion by going to http://127.0.0.1:7860.
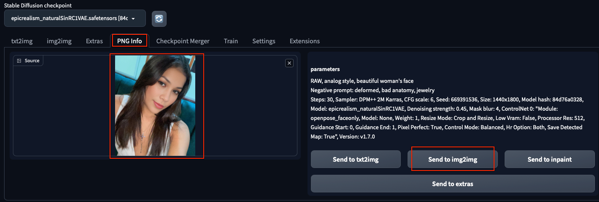
Click on PNG Ingo and drag the downloaded file and click on Send to img2img:
Click on Lora and select epicCRealismHelper:
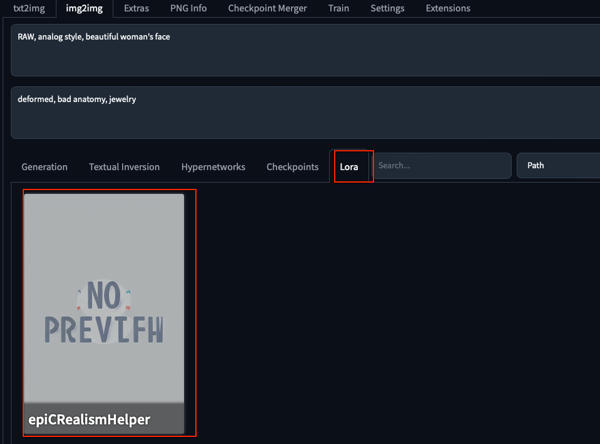
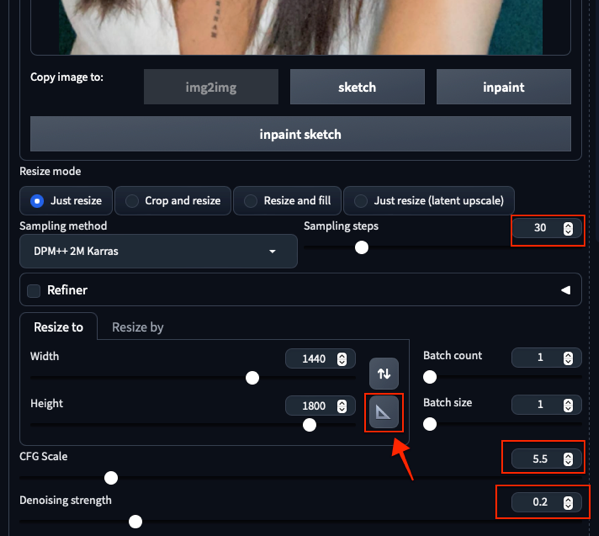
Click back on Generation and in the prompt change <lora:epiCRealismHelper:1> to <lora:epiCRealismHelper:0.7>. Change the following:
Sampling Steps to 30
CFG Scale to 5.5
Denoising strenght 0.2
Click on the Ruler
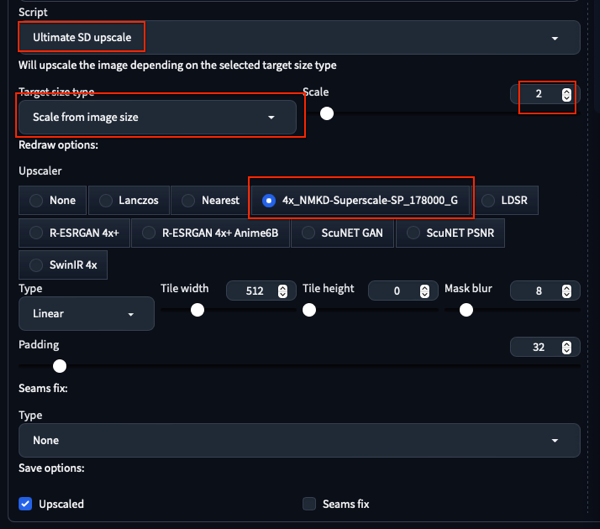
Under the Script, select Ultimate SD upscale. Change the following settings:
Target size type to Scale from image size
Scale at 2
Upscaler, select 4x_NMKD-Superscale-SP_178000_G
Now click on Generate:

That’s it!


No Comments